

Ever since first getting my Plustek 8200i, almost four years ago, I’ve been using pretty much the same workflow for scanning my color negative film.
It’s a process that has given me results that I’ve been very happy with a lot of the time.
However the workflow has felt less than bulletproof. Color reproduction has been somewhat inconsistent – with the output looking great, ok or off, almost at random (though most often ok or better).
As a result it’s sometimes taken more post processing than I’d like to get colors to a place where I’m fully happy with them. Occasionally it’s even been challenging to get there at all.
I’ve experimented with some changes to the workflow, but none of them felt like they gave a significant enough improvement across the board to warrant a change. So instead I’ve stuck with it, doing my best to get the most out of the process.
At least until now.
Launched a bit over a year ago Negative Lab Pro is a Lightroom plug-in for inverting negatives. It’s developed and maintained by a single person, motivated by having similar frustrations as me with finding a good scanning workflow.
NLP generally offers more consistent and appealing color output than any of the other methods or softwares I’ve used or tried.
It also has more intuitive and granular control over that output than what most alternatives can muster.
Combined these aspects with significant efficiency gains and NLP has proven, for me at least, to be a game-changer for scanning color negative film. So for me it’s been well worth the current price of $100*.
* There’s a trial version available to get a feel for how it works.

Silverfast
Negative Lab Pro
When I first switched over to using Negative Lab Pro I did a handful of 1:1 comparisons. The differences between these unedited inversions were subtle most of the time. Colors tended to look a little more natural and there were less color casts in highlights and shadows with the NLP conversions, though the difference was usually not earth-shattering.
The noticeable differences however, appeared once I started working with the NLP across more frames. The toolset was quicker too work with, there was an increase in consistency that became noticeable and the files also seemed to hold up better when edited. I also needed to spend less time editing each frame before arriving at a result I was happy with. Overall it proved a notable improvement.
At its core Negative Lab Pro is designed to invert positive photos or scans of negatives (i.e. where negatives still look like negatives). Its key feature is to eliminate the orange mask in color negatives while giving good control of the colors during the process.
The original scope for the plugin was to process negatives digitized using a digital camera, but it’s still been very serviceable with files from dedicated film scanners. With recent versions the support for scanners has become more robust, giving even more consistent results.
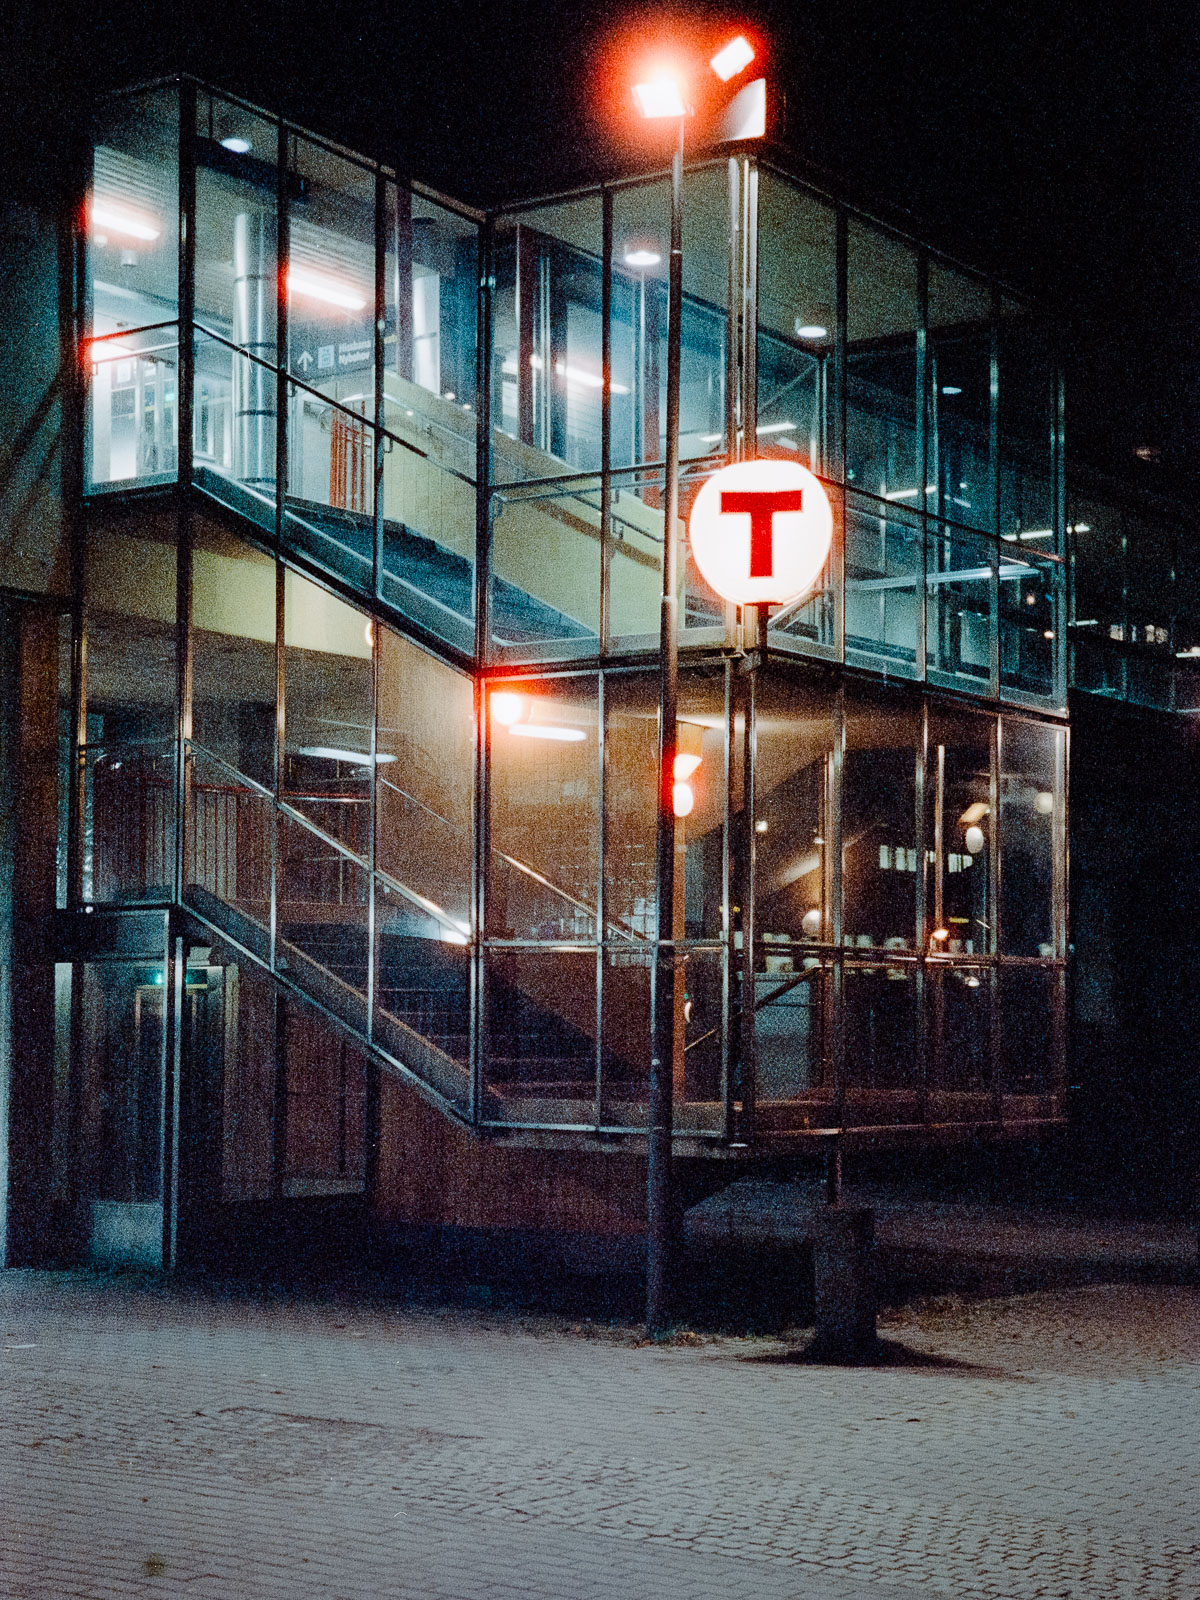
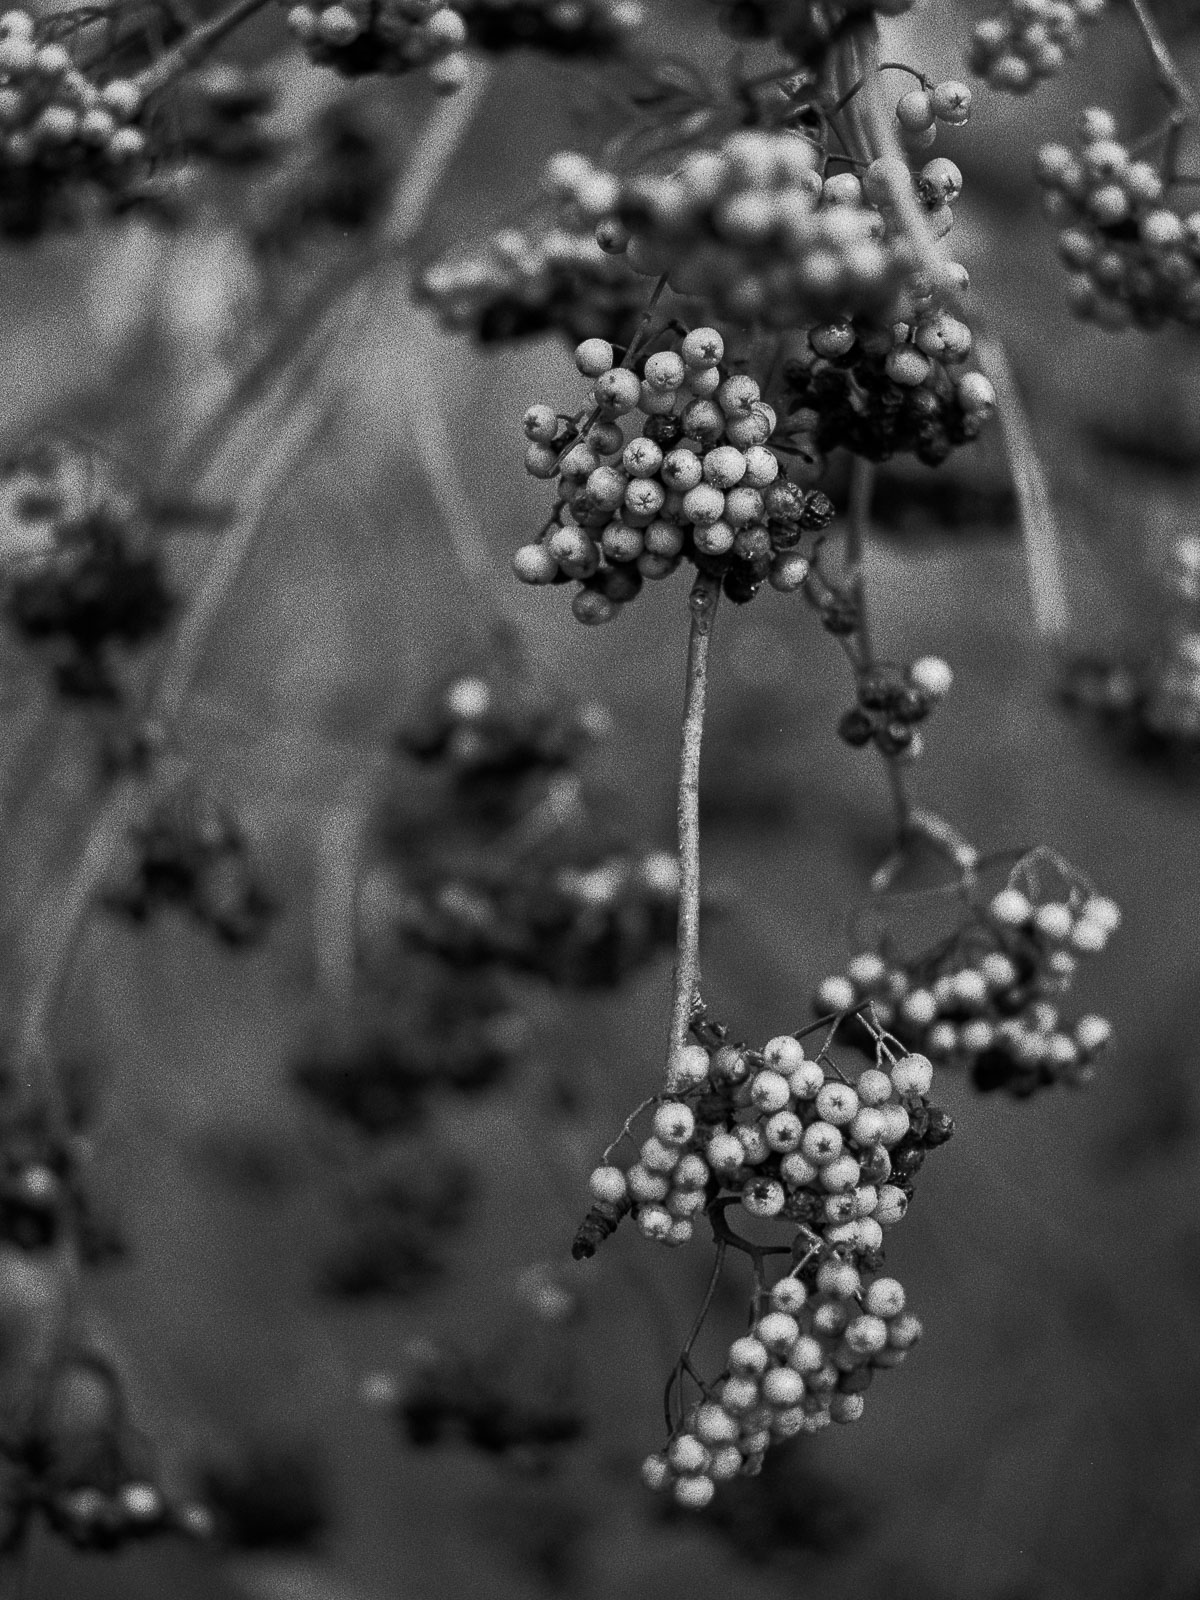
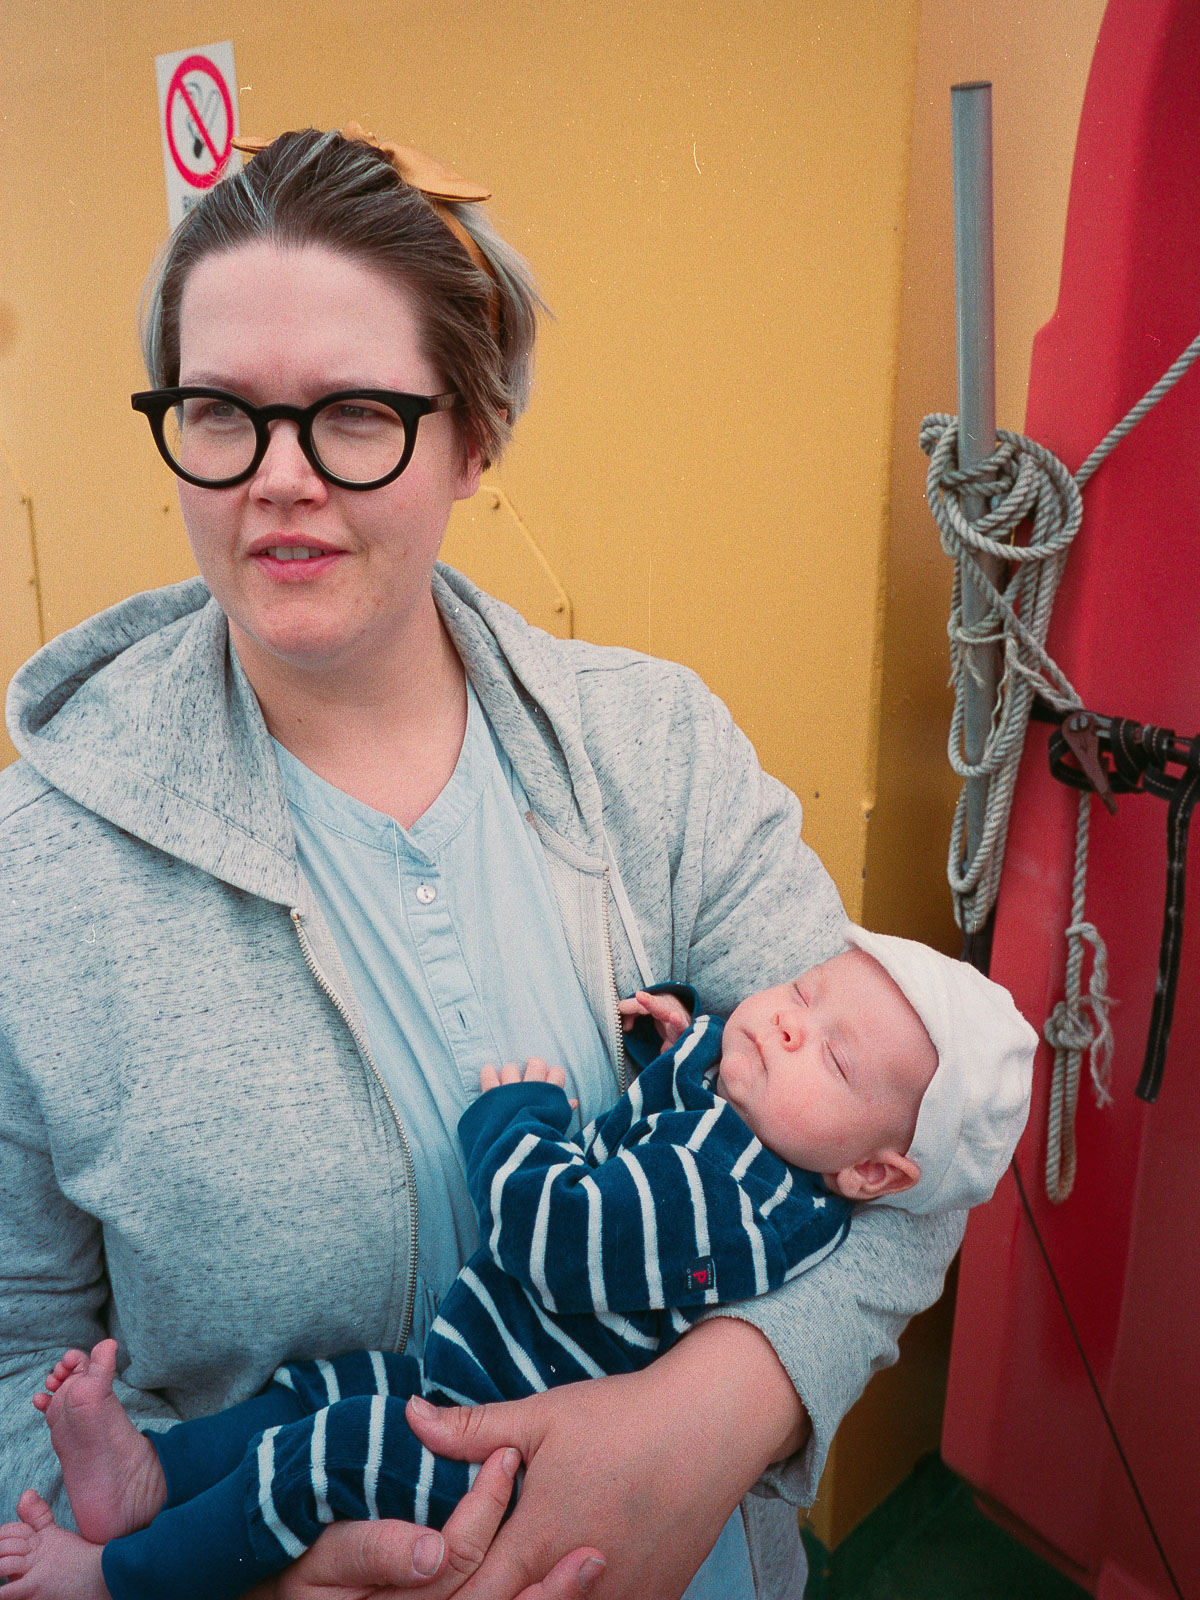
Negative Lab Pro is designed to invert negatives. Its main appeal is for color negative film where it does better than a lot of alternatives, even with tricky films such as Cinestill 800T in the above example. There’s less motivation to use it with black & white though, as other approaches aren’t as finicky.
Doing the inversion as part of the post processing instead of in the scanning software obviously makes for a fundamental difference in terms of workflow.
I’ve previously done a lot of the heavy lifting in Silverfast*, where I’ve been using the tools available to make a reasonably good looking inversion and then making more granular edits in Lightroom. In this new workflow I just use Silverfast for capturing a 16-bit positive scan and then everything else is happens in Lightroom.
* I use Silverfast with my Plustek 8200i which I use to scan all my 35mm film. With my Epson V550 that I use for 120 film I scan with Epson Scan. As I shoot way more 35mm than I do medium format, I’ll focus on this process for now, but in terms of the overall workflow it would be nigh on identical for scanning with the V550 and Epson Scan.
That is the basic process, but let’s break it down a bit.


So, let’s break down my end-to-end flow for digitizing negatives.
To scan the negatives the first step is to mount them in the scanner’s film holders.
I get my film developed and cut in strips of six from the lab, fitting the holders.
Whenever handling the negatives I wear pair of cotton gloves to avoid getting any smudges on them.
I always fiddle around a little to make sure I mount the negs straight and with as little overlap of the holder itself as possible.
Something I used to do was to use a rocket blower to get rid of dust, but I’ve stopped doing that (except whenever I spot big chunks of it). Over time I’ve noticed it actually doesn’t make that much of a difference with the smaller specks.
Finally the holder goes in the scanner and we get to scanning.

Next up is making the actual scan of the negative.
With this new workflow there’s very little to this step.
Basically all I do is to set Silverfast to scan a positive DNG-file* at 16-bit color (referred to as 48-bit in Silverfast).
* A TIFF file would be the obvious choice, but DNG’s have a few compatibility advantages with NLP.
I leave all additional processing off, so no dust removal or sharpening is done at this stage.
Beyond that there’s not a need to make a preview scan anymore – instead I’m going straight for scanning to file. This shaves off a noticeable bit of time per frame.
With my Plustek 8200i I’ve been sticking to scanning at 3600 dpi, which yields files that have plenty of resolution for everything that I want to do.


Scans then get imported into Lightroom.
To get the files ready for inversion there are a few quick steps that allows for improved results.
First up is to set white-balance. Here the recommendation is to pipette off of a blank part of the film stock, though auto white-balance works mostly fine as well. Note that you can then reuse this white-balance setting whenever scanning the specific film stock again.
Depending on the scanner and file format you’re using there might also be benefits gained from updating the file’s gamma and profile through bespoke tools included with NLP, though neither step is strictly necessary.
Now we arrive at the fun part. This is where the magic happens.
Bring up NLP through Lightroom’s menu or using the keyboard shortcut, set up the conversion, click a button, and you’ll be very close to done in seconds.
In terms of settings before conversion I tend to stick with the Noritsu color model and bumping the pre-saturation to high, mostly to have a bit more channel separation to play around with later.
After conversion I usually set the contrast to “All soft”, giving me a bit more headroom for additional tweaks. I might also make some rough adjustments to the tonality if the scan looks overly bright or dark at this stage.
The key way to control color has proven to be to use “auto color” as a starting point and then tweak the correction axis and amount if things look off. To me this is a very intuitive way to get to the right ballpark. And in the majority of cases this is the only adjustment that’s really needed.
Occasionally, if there’s a specific color cast that looks out of place, I also dive into the color adjustments for Mid/Low/High tones and do some minor tweaks. This is a great feature to have at hand and with the way the controls are laid out I find it easy and intuitive to work with colors and casts.

By now I have scans that happy to use as a starting point for additional editing – something that’s always needed for any images I feel like printing or publishing.
I tend to make a JPG export from the converted DNG for further work*.
* There are a few reasons for this. For starters all controls on the converted DNG are inverted, making it hard to intuit color controls in particular. Depending on the inversion the ratio of a lot of the controls can be off as well. The DNG is also a little problematic to edit in the mobile app since the NLP-specific color profiles don’t carry over. Academically I know that a lossless file would be preferable at this stage, but as I still keep the original DNG for potential heavier edits I feel that the lightweight nature of the JPG brings enough benefits for me not to worry much about theoretical quality sacrifices.
To finalize images I generally fine-tune tonality, pull back saturation (often selectively for different colors), set input sharpening, crop out the film border and clone out any dust.
I’ve rarely felt the need for heavier edits since switching over to this workflow as I often get closer to a final image out of NLP than with my previous approach.

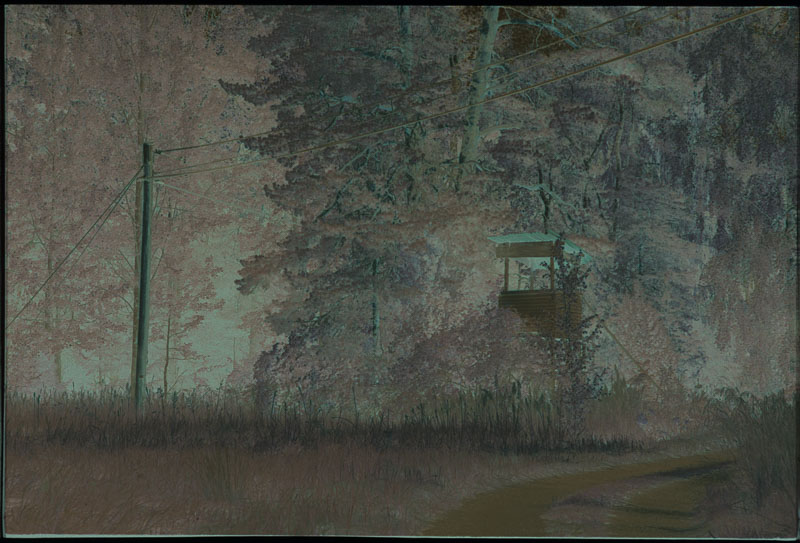
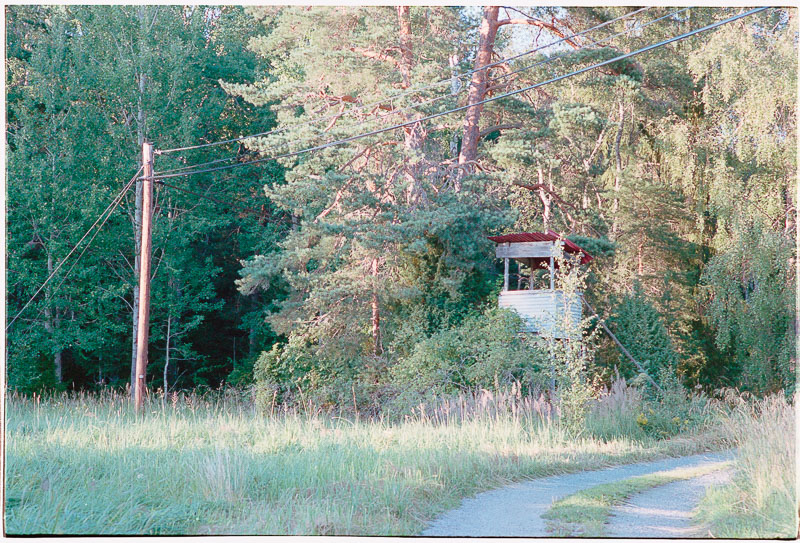
To more clearly illustrate the necessary steps, let’ go through the process for the image shown above. First step is to scan the negative. This is the linear scan as it looks straight out of Silverfast.
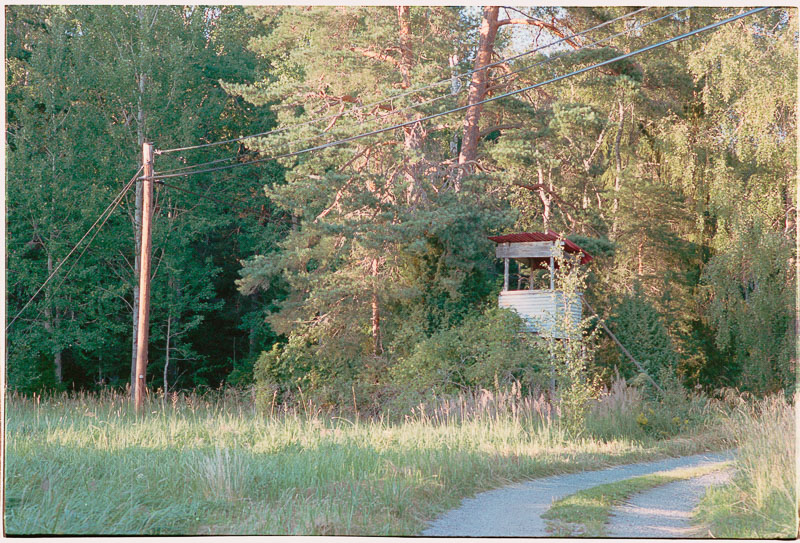
The first step in Lightroom is to set the white balance to match the film base. Here I’ve used a preset for the film stock that I’ve prepared from before. Otherwise I’d simply use the pipette on a part of the scan where the film base is showing. This makes the negative look less orange.
This is what NLP gives with my default settings (Noritsu color, high pre-saturation, all-soft contrast, auto color). This is already a pretty starting point, but I’ll make a few additional tweaks in NLP before committing to the conversion.
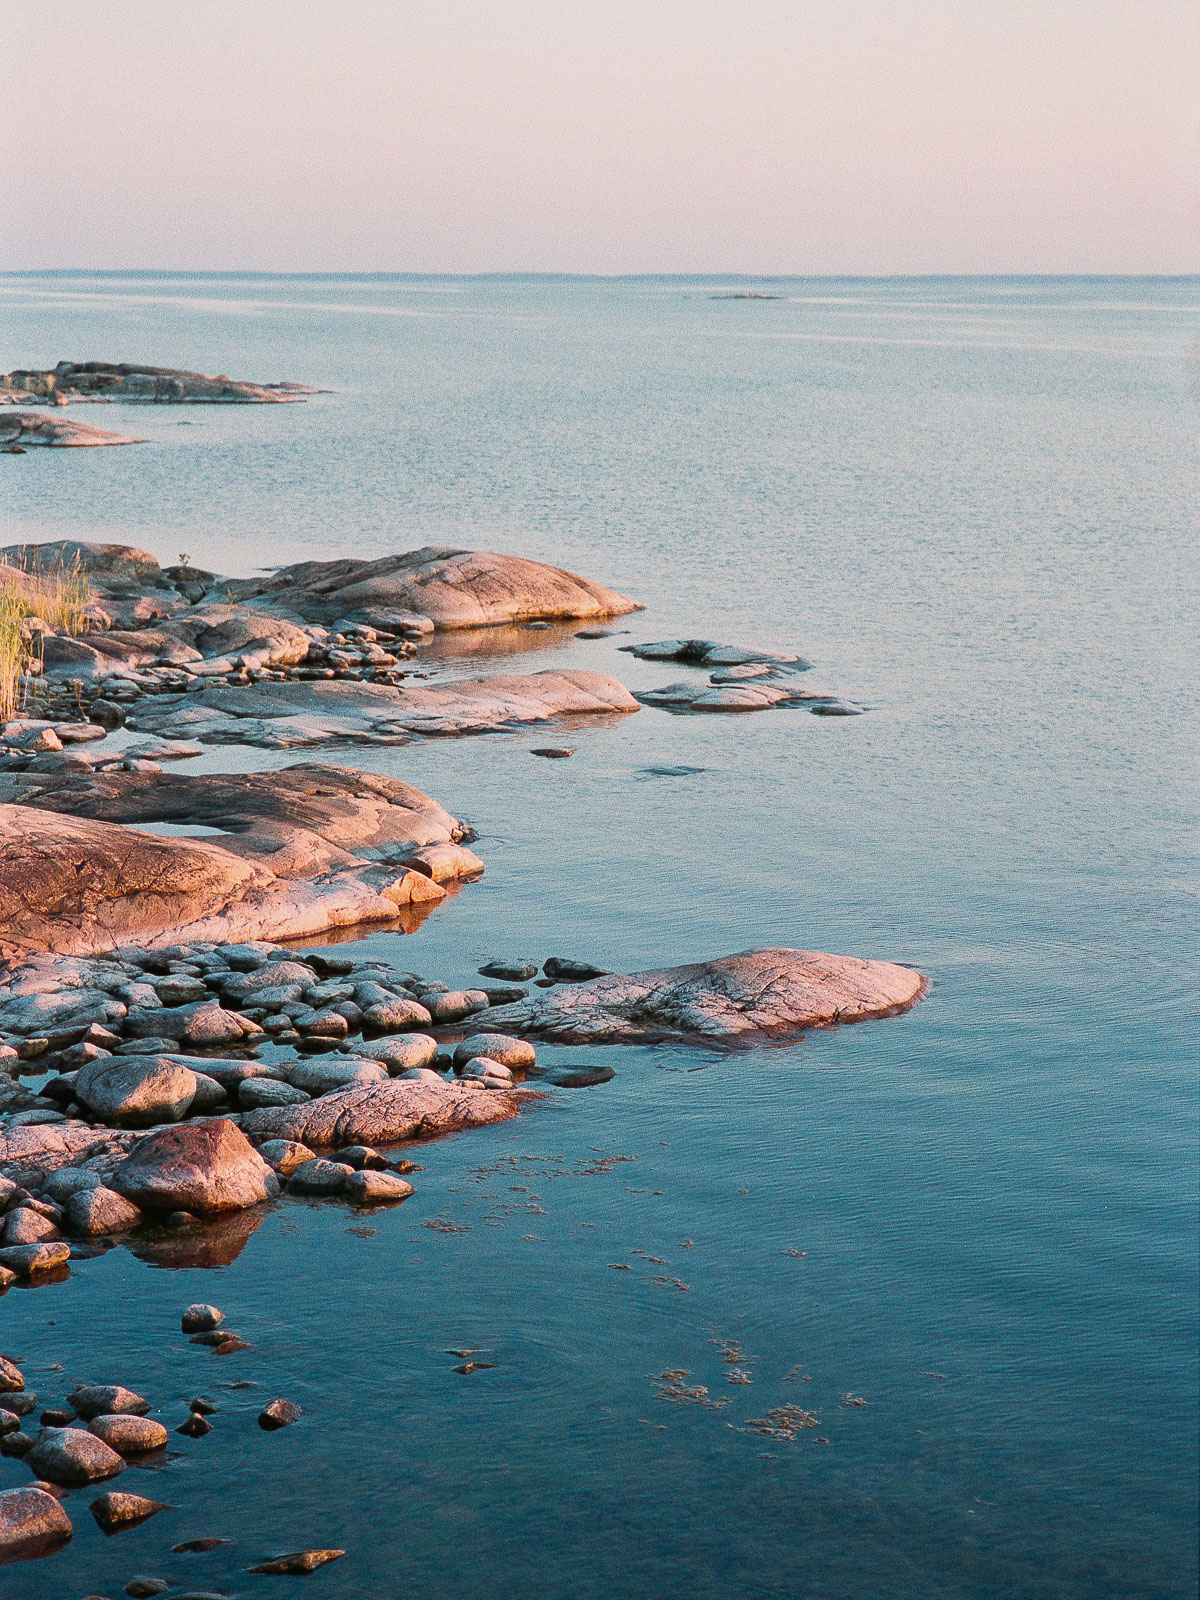
To me the initial conversion looked a little blue, especially considering the light from the sun low in the sky. So here I’ve warmed it up a bit by tweaking the color correction axis and amount in NLP. I’ve also pulled back whites and highlights a little to give me a less harsh roll-off. With these changes I’m pretty happy with the conversion as a starting point.
I then move on to working with the image using the default Lightroom toolset to make a final edit. I tend to do a bunch of minor things at this stage. Most obvious is the adjustments to the overall tonality, with deeper shadows and higher contrast in this case. The film border is also cropped out. More subtle edits include hue and saturation tweaks, sharpening and dust removal. While there are a lot of controls being tweaked at this step, there’s not generally a whole lot of time spent with each. A few minutes is generally plenty to get to something final. With these quick edits I feel pretty happy with the image and will call it done.
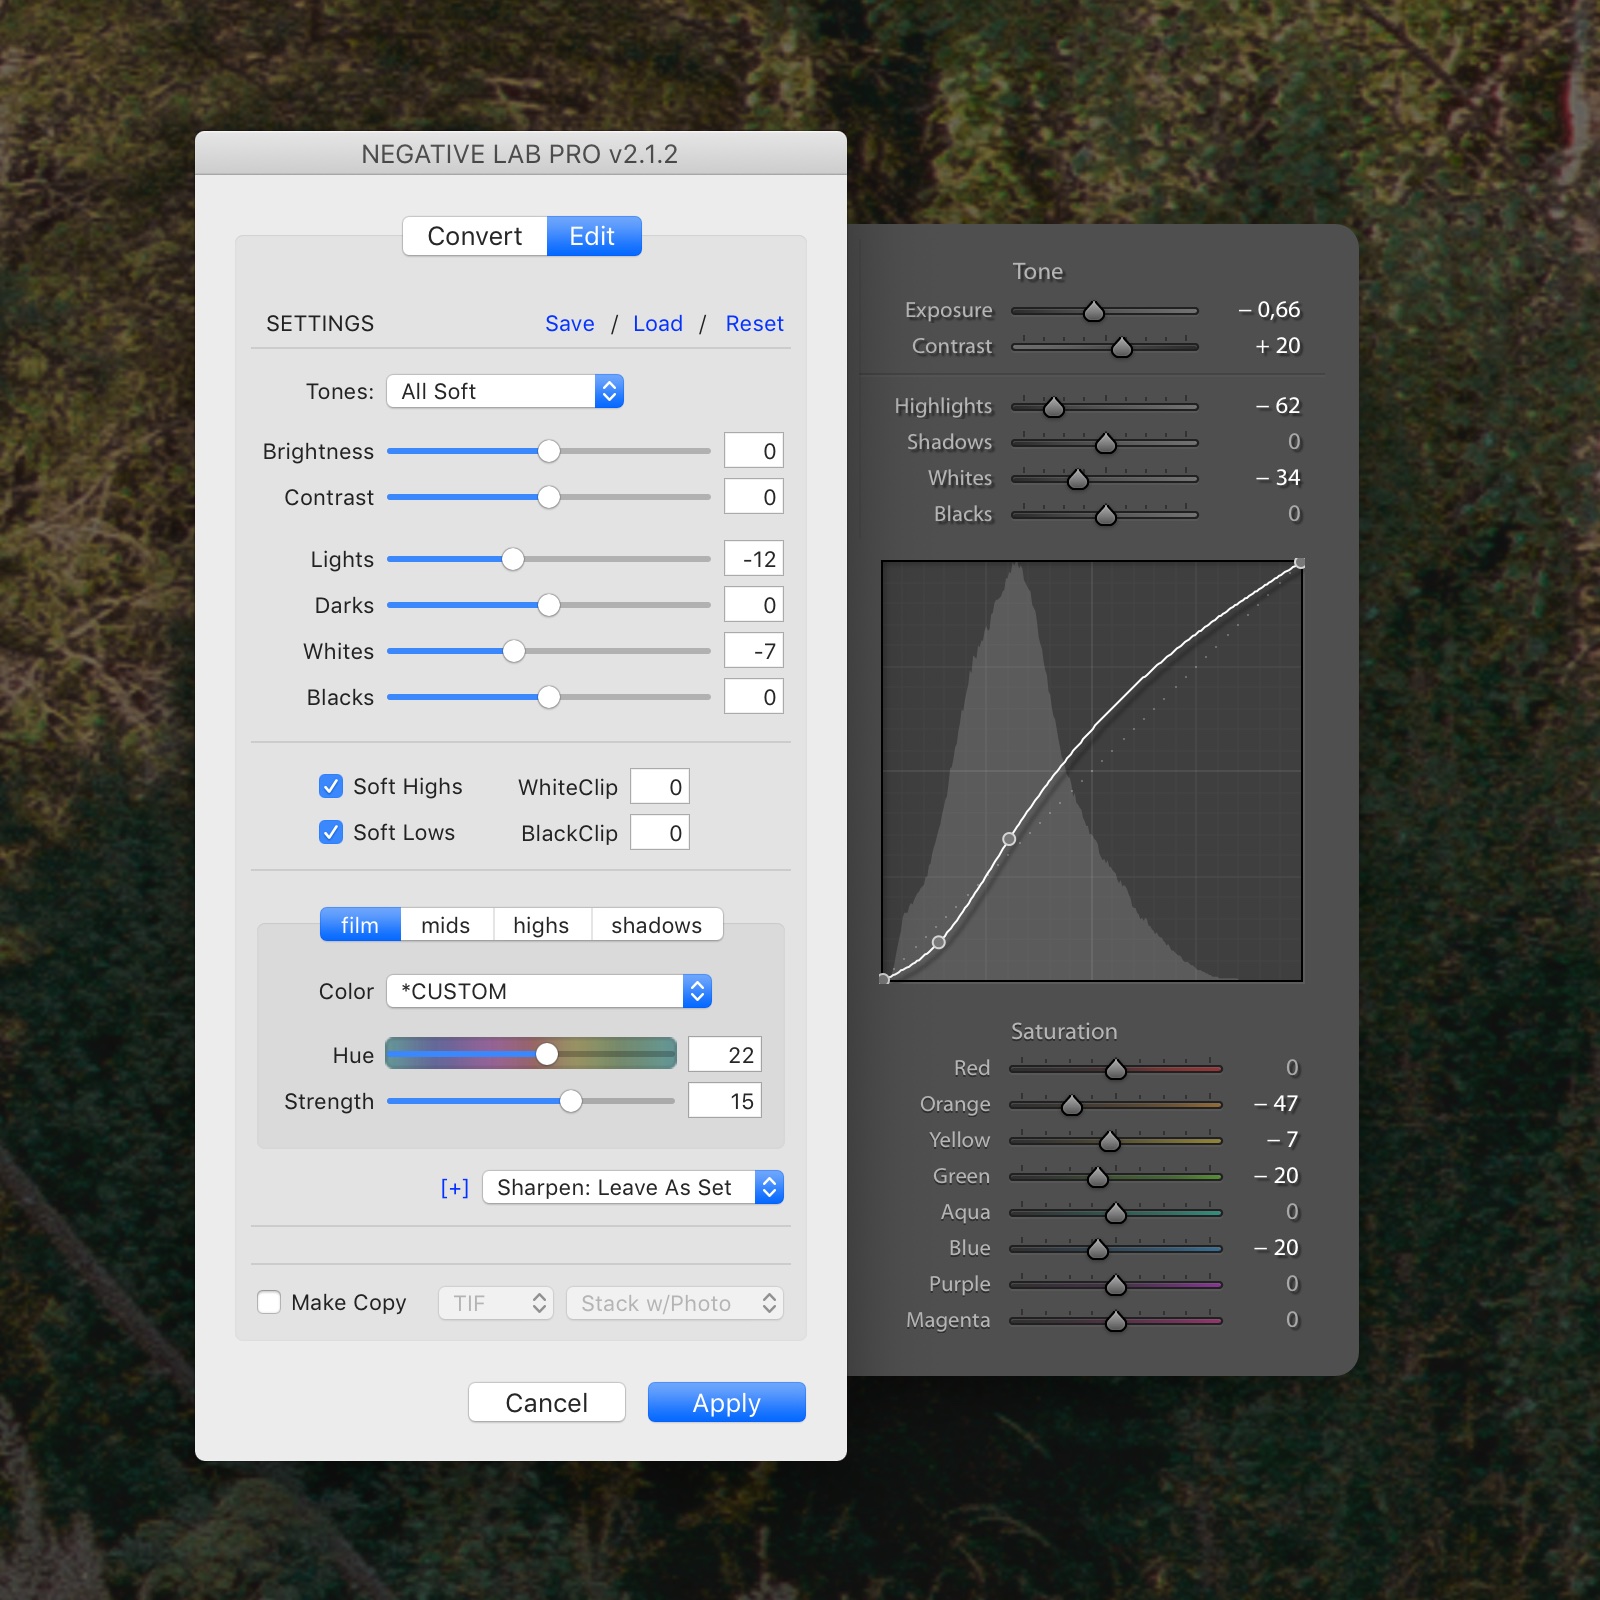
A clutch of the most important controls for finalizing the image above. On the left a look at the Negative Lab Pro control panel. On the right an example of the Ligthroom develop settings.
One final note is on how I manage my negatives once scanned.
I have a system where each roll of film I shoot gets assigned a number (for those curious about the specifics – I use YYRXX e.g. 19R11 for roll 11 in 2019). I use this number for note taking while shooting, as well as for naming the scans. I also label the film sleeve with that number before putting it into a binder where I keep everything in a chronological order.
I find this to be a straight forward system that makes it easy to keep things structured, as well as to backtrack to a specific roll later, should I need it.

Beyond this new approach to scanning and inversion a few other things with my workflow have also changed in conjunction with it.
The main change being that I’ve updated Lightroom.
I’ve been running Lightroom 5 since it came out and not felt too compelled to update. Version 5 has done everything I’ve needed and has been working great. But recently a few outside factors have pushed me towards an update.
For starters NLP couldn’t run on this older version (which is actually the main reason it’s taken me as long as it has to give NLP a spin).
Another factor is that between family-life and being quite busy at work I’ve found it difficult to find time to edit or cull photos. In this context, being able to do some basic work on the go started to look pretty appealing. But that wasn’t an option with older Lightroom versions.
So I decided to pull the trigger and upgrade to Lightroom Classic.
I’m fairly happy about upgrading due to it solving for the two factors outlined above, but I must say I feel critical of the trajectory that Adobe has put Lightroom on. Having two versions of the software makes it very hard to understand what to go for and what the future will look like. I’m also not a fan of being tied into a subscription software.
The performance also took a real nosedive with the upgrade and working quickly and efficiently has honestly become harder because of it. Sure, I’m not running the latest and greatest laptop (I’m using the 2015 retina MacBook Pro 15”), but when everything else runs great it really makes you question how well the software’s been optimized.
Beyond that though there are some clear benefits to rolling over to the newer version.
The previously mentioned ability to edit on the go really is fantastic. The interface and functionality in the mobile app is well thought out and fairly fully featured. Some work, like cloning out dust for instance, even feels easier to do on the phone thanks to direct manipulation.
The maximum possible radius for sharpening has also been increased from two to three pixels. This might not sound like a big deal, but for sharpening high resolution film scans in particular this change actually makes a big difference for bringing out detail without over-sharpening the grain structure.
Then there’s the compatibility with NLP, rounding off the improvements and making the upgrade feel worth it overall.


In terms of the end-to-end workflow then there are some major improvements with this new approach. A few obvious ones, others perhaps less so.
Most significant is probably the step up in color rendition and control there of, thanks to NLP. In terms of out of the box results there’s better consistency and frequently a more appealing output.
Beyond that the more intuitive and granular control over color makes it easier to fine tune those out of the box results to something even more appealing.
Combined these factors make it both quicker and easier to get results I’m happy with. At times I feel the results are even better than I saw with my previous approach. This improved color output and control was my main motivation for overhauling the workflow, so I’m happy that it panned out.


Still, the gains go further.
Another, probably less apparent, upside I’d like to bring up is the increase in speed this new process brings, most noticeably at the scanning stage. Where I previously ran a preview scan and then made several inversion adjustments before making the actual scan I now skip all that and go from real scan to real scan. This results in roughly halving the time required to scan a full roll. It’s a significant difference that makes it easier to find the time to scan in the hectic day to day.
When taken together then this new workflow is a big improvement. To me it offers the best of two worlds – the control and quality from home scanning combined with the appealing color associated with lab scans. Its still not quite as convenient as getting final scans from the lab obviously, but with the speed and efficiency gains with this new approach it’s honestly not that far off.
Now I started off by writing that my previous approach hasn’t been bulletproof and I want to be clear that this new one also isn’t infallible. But it’s better often enough to feel like a significant improvement. So while it’s not a silver bullet it’s still an excellent tool.
Overall then I’m very happy with the changes to my workflow. And in terms of specifics – Negative Lab Pro has my staunchest recommendation.
All photos in this post were taken using the Leica M4-P or Leica II. Lenses used were the Voigtländer Nokton 40/1.4 Heliar 75/2.5, Color Skopar 28/3.5 or Color Skopar 50/2.5. The photo of Lightroom on the phone was made using the Fuji X100T. Exif-data is intact. Open any image in a new window for a closer look.